

Installing the Tank Level Sensor
Mount it on top of the tank, wake it up, enter the tank height in the app, set an alarm. Most installs take about 15 minutes with a drill. This page is the full installation guide; the same guide is available as a PDF.
Guide revised October 2026. Questions or a step that does not match your unit? Call (385) 534-8200.
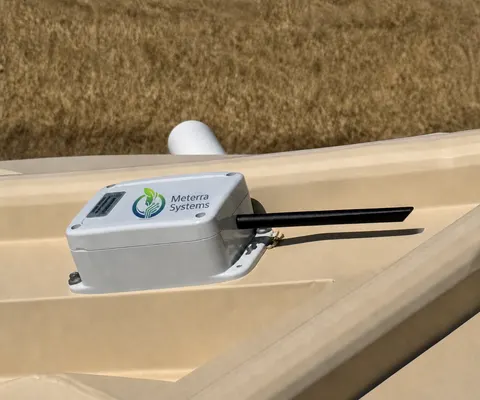
- Sensing
- Ultrasonic, non-contact. It reads the distance from the sensor down to the liquid surface.
- Range
- About 10 in to 23 ft (250 to 7,000 mm) from the sensor to the surface
- Reporting
- A reading every 60 minutes; more frequent readings can be requested
- Battery
- 2+ years
- Enclosure
- IP65 / IP66 weatherproof
- Network
- Cellular NB-IoT. No Wi-Fi or power needed at the tank.
Before you start
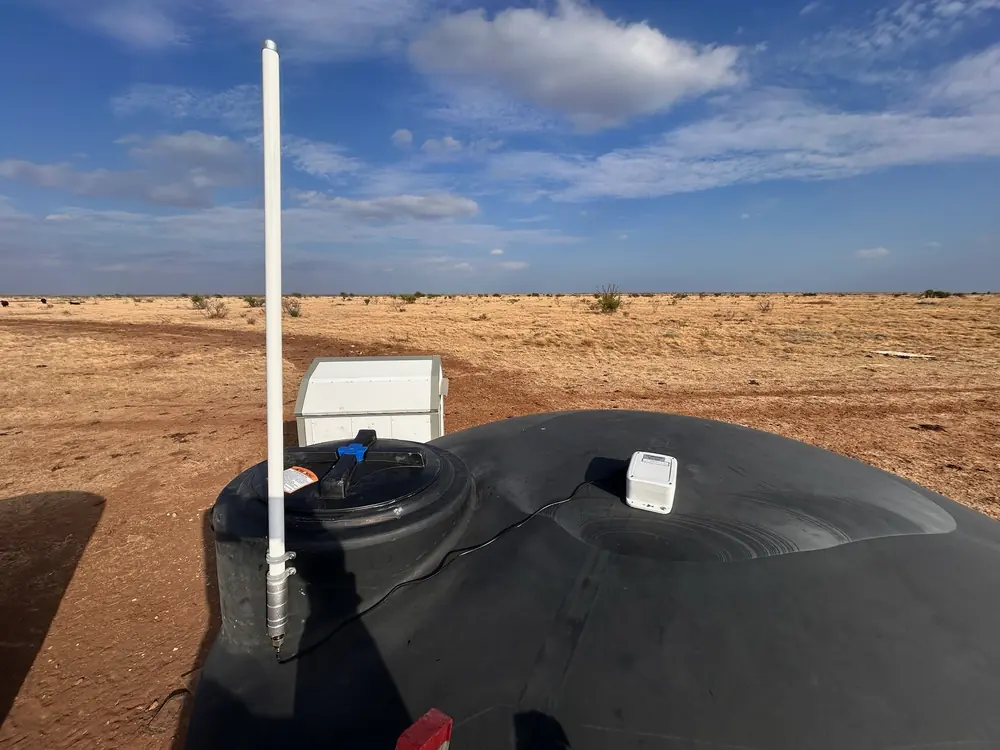
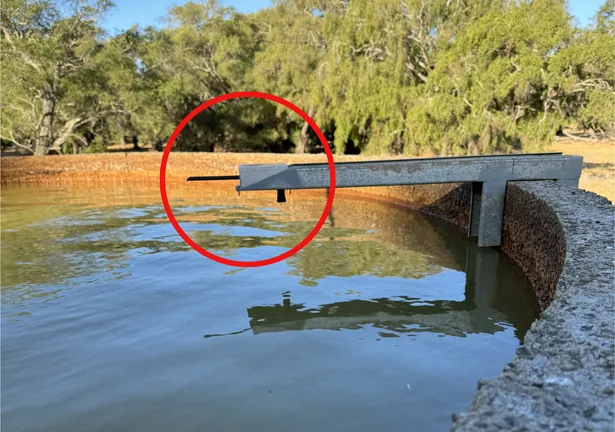
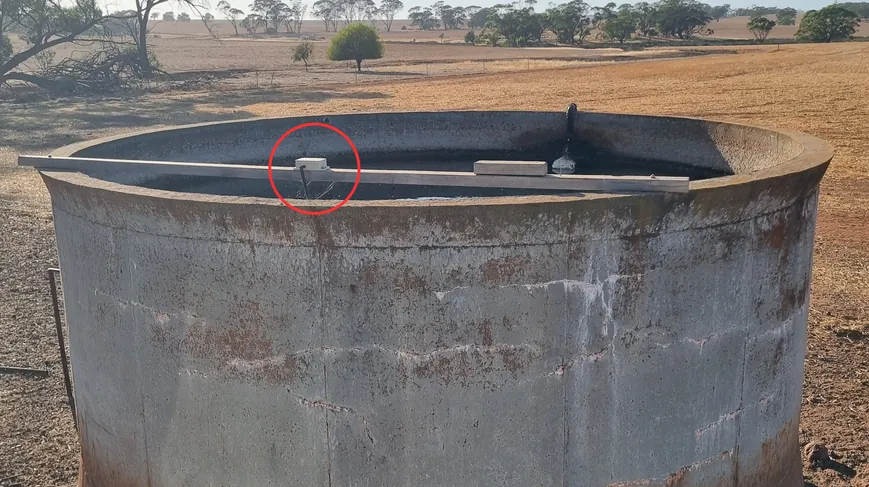
You need a drill with a 30 mm (1 3/16 in) bit or hole saw, a screwdriver, and two to four screws to fasten the sensor to the tank. Open tanks and unusual shapes may need a bracket; see the mounting photos further down.
Where to mount it
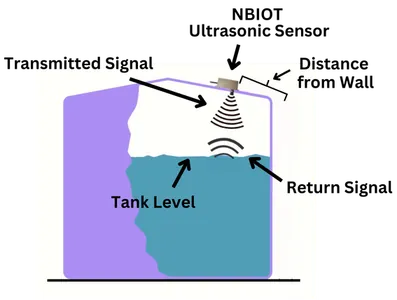
- Position the sensor at least 10 in (250 mm) above the maximum liquid level.
- Keep it away from the tank wall. The taller the tank, the further from the wall it needs to sit, so the signal does not clip the side:
| Tank height | Minimum distance from the wall |
|---|---|
| 3.3 ft (1 m) | 16 in (40 cm) |
| 4.9 ft (1.5 m) | 22 in (55 cm) |
| 6.6 ft (2 m) | 28 in (70 cm) |
| 8.2 ft (2.5 m) | 31 in (80 cm) |
| 9.8 ft (3 m) | 45 in (115 cm) |
| 11.5 ft (3.5 m) | 51 in (130 cm) |
| 13.1 ft (4 m) | 57 in (145 cm) |
| 16.4 ft (5 m) | 73 in (185 cm) |
- The maximum roof angle is 40 degrees.
- Do not mount it at the very center of a flat poly tank roof.
Mount the sensor
- Attach the antenna to the device, hand tight.
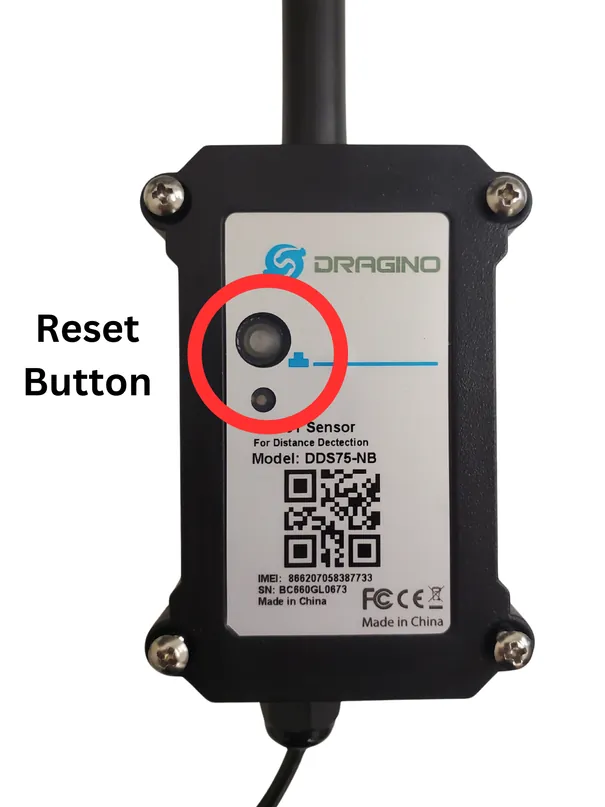
- Wake the device. It may be in sleep mode. Open the cover and press the button on the black box for 5 seconds. Wait until the light goes green and then flashes (this is a reset). Then screw all four cover screws back in securely.
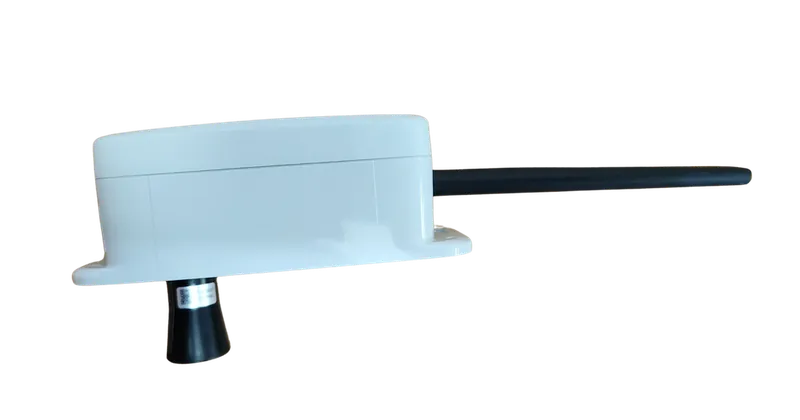
- Make the hole in the tank for the black sensor cone. A 30 mm (1 3/16 in) drill bit is recommended.
- Fasten the sensor with two to four screws.
- Open tanks: run a beam across the tank or use a custom bracket so the sensor sits over the water with a clear view down.
Set up the tank in the app
The sensor measures a distance. The app turns that into a level and a volume once it knows the tank, so enter three numbers after the first reading arrives.
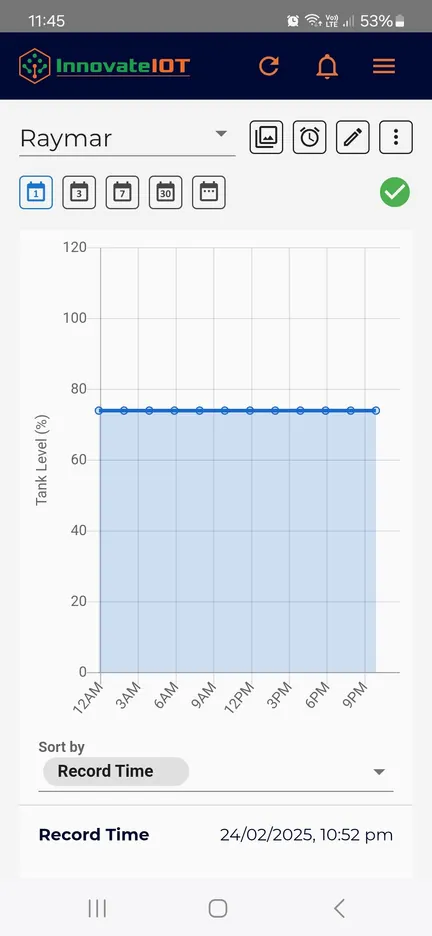
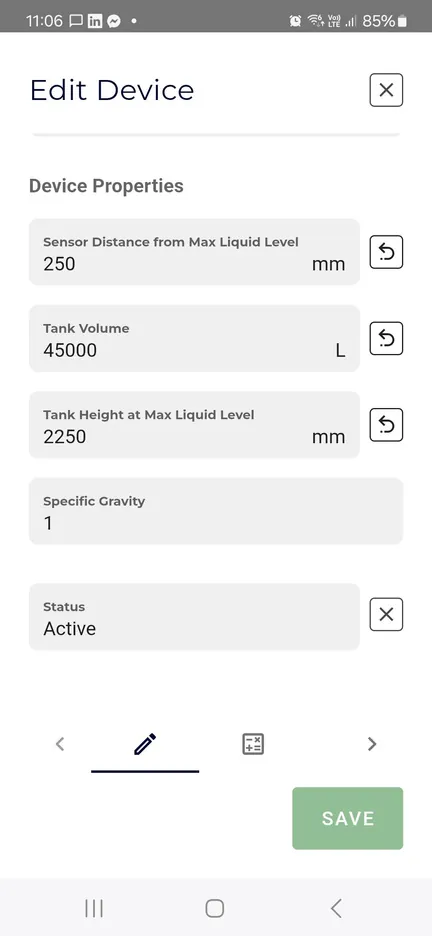
- Open the device you want to edit and tap the pencil icon.
- Sensor distance from max liquid level: how far the sensor sits above the top of the maximum liquid level.
- Tank volume: the tank’s capacity.
- Tank height at max liquid level: the height of the liquid when the tank is full. This is commonly the overflow height.
- Specific gravity: leave at 1 for water. For diesel, fertilizer, or other liquids, enter the liquid’s specific gravity here.
- Tap Save.
Add an alarm
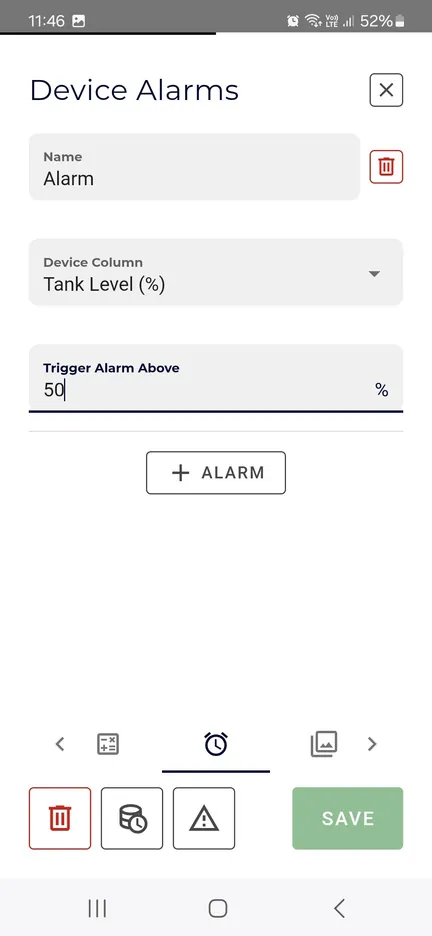
- Open the device, tap the pencil icon, then the alarm bell tab.
- Select the type of alarm: above or below a level, by tank level % or tank volume, or a rapid increase or decrease (a fast drop usually means a leak or a stuck float).
- Enter the level % that triggers the alarm.
- Tap Save.
- Make sure notifications are turned on for the app in your phone’s settings, or the alarm has nowhere to go.
Troubleshooting
No data
- Check that the antenna is on firmly and not damaged.
- Check the battery voltage on the last reading. It needs to be above 2.9 V.
- Do a manual reset (steps below).
Odd readings
- Check the device for damage.
- Check the sensor cone for bugs, spiders, or webs blocking the ultrasonic path, and clear them out.
- Check the cone for water droplets from tank condensation. A 30 to 50 mm (1 1/4 to 2 in) vent hole next to the sensor lets the humidity out of the tank.
Manual reset
- Open the outer box lid.
- Press and hold the button for five seconds.
- The light below it flashes 3 times.
- It flashes again about 30 and 60 seconds later.
- Within 2 to 15 minutes, new data should show on the dashboard.
- If nothing arrives after 15 minutes, repeat the reset. If it still shows no data, call us.
The hardware this guide covers
Every device reports to the same Meterra dashboard and app.
Stuck on a step, or not sure which sensor fits your site? Call or text and a person who has installed these will answer.
Related Meterra pages
- Tank Level Sensor: the product page, with posted pricing and specifications
- Submersible Tank Level Sensor: the pressure-sensor option for tanks deeper than the ultrasonic range
- Ultrasonic vs. pressure sensors: which sensing technology suits which tank
- Customer installs: photos of real mounts for ideas
Warranty, returns and shipping for every Meterra device are on the Shipping & Returns page.